|
Getting your Trinity Audio player ready... |
With cars being the second home for many families out there, most people now prefer to drive in the comfort of their cars. Be it a long drive to another city for a wedding or a short drive to a market, no one in their right mind minds a drink or some munchies to munch on along with some mesmerizing views on the way and soft music in the background. In this case, clean in between the car seats and armrest console can be ignoring.
Not to mention the post-coved car dine-ins which have now become a new trend of fine dining have made it almost impossible to keep the car clean at all times.
Food crumbs, empty wrappers, bottles, cups and toll/parking receipts are some things that are very common to be found in almost every other car. And if you have a pet then pet hairs are yet another thing that could be added to the list.

Cleaning in between the seats and the center console can be quite a tough job. While it’s easier to pick the wrappers and bottles, it’s quite cumbersome to get rid of the food crumbs, pet hairs, or drink stains specifically between the car seats and in the crevices.
One can ignore it for some time but eventually, you will have to clean it up to enjoy a smooth ride because a clean car would always lighten up your mood in turn making your ride effortless.
Step-By-Step Guide to Clean in Between the Car Seats and the Center Console
Now you would be thinking that cleaning the interior of the car can be managed but “How can you clean the area between the car seats and the center console?”
Well, if you are the one who prefers to clean your car every day then there is a high chance that you are not required to put any extra effort. All you need to do is dust the mats and the interior of the car every now and then and boom you are good to go.
But if you prefer to clean your car after 2-3 months then you my friend are in for a long exercise. Fret not. We are here to guide you through all the steps in detail so let’s get to it:
Required Tools:
First, you will need a set of tools to get your job done in very little time, which includes;
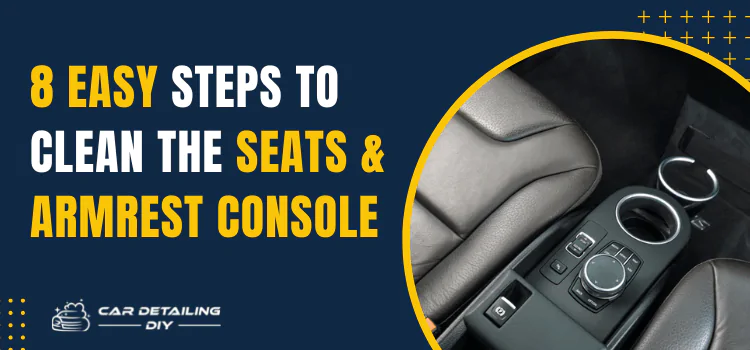
8 Steps to Clean the Front and the Armrest Console:

Step 1: Park Your Car At a Secluded Place
Before starting with all the cleaning, make sure that you have parked your car at a secluded place where you could easily open all the doors of your car and take out parts of your car (if required) without disturbing anyone in the process.
Step 2: Remove The Evident Trash
With “evident” it means the bigger trash such as wrappers, empty bottles, tissues, receipts (if any), etc. Look for any such trash on the seats, under the seats, and the holders of your car to remove it instantly.
Step 3: Dust The Seats
Dust the seats of your car with a cloth or something so that all the crumbs or dirt on the
seats would accumulate on the mats of your car. Sweeping the seats would ensure easy
and sound vacuuming, efficient enough to get rid of all the dirt.
Step 4: Remove The Car Mats
Now, remove all the mats or carpets of your car to get rid of the dirt from the floor of your car.
Step 5: Remove The Car Seats (Optional)
You can either remove the front seats with some professional help or just move your car seats to ensure appropriate cleaning.
Is It Required to Remove The Car Seats?
It is not required to remove the car seats however with the car seats all removed, the process of cleaning becomes much easier. So, move your seats as back as you can to make space for yourself to clean everything with ease.
Step 6: Vacuum Between The Seats And The Console
Vacuuming is a very important step while cleaning in between the car seats. The best way to clean in between the seats and the console is by using a high-powered vacuum (easily available on Amazon) along with a crevice tool for efficient cleaning in hard-to-reach spaces and tricky edges.
The best way to vacuum is to start with the seats and the console. Use your vacuum tool
and start with the backrest, bottom of the seat, and along the sides of the console. Then move towards the carpeted floor of your car and get rid of all the loose dirt present on the surface.
After getting rid of all the prominent loose dirt, attach the crevice tool to your vacuum, and now try to clean the narrow and hard-to-reach edges. Move the vacuum on all the folds, crevices, and seams of your seat as there is a high chance of crumbs and dirt in there.
With the crevice tool attached to the vacuum cleaner, gradually move towards the floor and the sides of the console to gather all the dirt that exists.
Make sure to use the detailing brush alongside the vacuum while working on the crevices and the tricky edges to easily collect the stockpile of crumbs/dirt.
Step 7: Use Compressed Air And Steam Cleaner
Use the compressed air cleaner to get rid of any dried stain or drink spill anywhere in the car. There is a high chance of you finding it in the console or on the floor of the car. Wipe that area with the microfiber cloth as it would help you with all the minor particles of dirt missed earlier.
In case of tough stains, use a steam cleaner and keep it on the stain for some seconds then brush off the dirt.
Step 8: Dry
Lastly, wipe everything with the microfiber cloth and let it dry for some time before placing the cleaned car mats back.
Steps to Clean The Back Seat
Now to start with the backseat cleaning, first move the passenger and the driver seats as forward as you can to make space for easy cleaning.
Follow the same procedure as that in the front. Start with vacuuming the upholstery and the floor and get rid of all the loose dirt and crumbs.
Use an upholstery cleaner along with the detailing brush to make sure there are no tough stains followed by the wiping of a microfiber cloth. Let it dry for some time and you are all set to move to the last part.
Steps to Clean The Car Seat Rails
As the front seats are already moved forward, all you need to do is vacuum the back part of the rails along with the detailing brush to remove all the accumulated dirt on the rails that prevent the seats’ movement. Follow the same procedure for the front part, and you are all set for a smooth drive.
How to Prevent Dirt and Debris from Accumulating Between Seats
Once you’ve gone through the effort of cleaning between the seats and console, it’s a good idea to adopt a few simple habits to keep it clean for longer:
- Use Seat Gap Fillers: Seat gap fillers are foam or plastic inserts designed to prevent items from falling between the seats and the console. These are particularly useful for preventing crumbs, keys, and small items from getting stuck in hard-to-reach areas.
- Install Removable Floor Mats: High-quality, removable rubber or carpet mats can be easily cleaned and reduce the buildup of dirt and debris on the vehicle’s floor, especially in hard-to-reach places.
- Use a Car Trash Bin: Invest in a small, portable car trash bin to keep your vehicle organized. Placing one near the armrest can prevent food wrappers, receipts, and other debris from cluttering the area.
- Regular Vacuuming: Incorporate quick weekly vacuuming sessions to prevent buildup. This will significantly reduce the cleaning effort over time and ensure that dirt doesn’t pile up in the crevices.
Conclusion
Cleaning in between the car seats and the console can be quite a task that requires
undivided attention and detailing for a satisfying output.
To make things easier, either you clean your cars every now and then to avoid this whole ordeal of cleaning or you could just follow the above-mentioned steps for a hassle-free cleaning and promising results.
FAQ’s
Is It Necessary To Start Cleaning The Front Seats?
No, it’s not essential to start cleaning with the front seats. You can start from the backseats and end up cleaning the front. However, it is preferred to start with the front side as it consists of the center console and several tricky edges and crevices.
What tools do I need to clean between car seats and the armrest console?
To effectively clean this area, you’ll need a few tools: a vacuum with a crevice tool, an air compressor or compressed air cans, upholstery cleaner, a microfiber towel, and an interior detailing brush. For tougher tasks, a steam cleaner might also be useful. These tools will help you reach and clean out the dirt, crumbs, and debris that accumulate in these tight spaces.
Can I remove car seats for more thorough cleaning?
While removing car seats can provide better access for cleaning, it’s not always necessary and can be quite complex. If you choose to remove them, it’s crucial to be cautious, especially to avoid triggering the airbag system. If you’re not experienced in removing car seats, it might be better to seek professional help or simply move the seats as far back as possible to create more space for cleaning.
How do I deal with stubborn stains and odors in these areas?
For tough stains, a mixture of baking soda and water can be applied to the stain, gently scrubbed, and then wiped away with a damp cloth. To tackle unpleasant odors, sprinkle baking soda liberally in the area and let it sit overnight before vacuuming it up the next day. This method is effective in absorbing unwanted smells.
How often should I clean between the car seats and console?
Ideally, cleaning this area should be done at least once a month if you regularly use your car for dining or long trips. For less frequent users, a thorough cleaning every 2-3 months can be sufficient, but you should vacuum weekly to maintain cleanliness and prevent excessive buildup.
Can I use a toothbrush as a detailing brush alternative?
Yes, a soft-bristled toothbrush can be a budget-friendly alternative to a detailing brush. It’s effective for scrubbing crevices and tight areas like the space between the seats and the console. However, detailing brushes tend to have softer bristles that are better suited for sensitive upholstery.
How do I deal with pet hair stuck between the seats?
Pet hair can be tricky to remove from fabric and crevices. A combination of a vacuum with a brush attachment and a pet hair remover, such as a lint roller or a rubber glove, can be very effective. For stubborn hair, a slightly damp microfiber cloth can help lift it off the upholstery.
Can I use a handheld vacuum instead of a full-sized one?
Yes, a handheld vacuum can be very effective for cleaning between car seats and the console, especially with the right attachments like a crevice tool. Handheld vacuums are convenient due to their portability and ease of use, making them a good choice for quick clean-ups.


Comments are closed.